

Table of Contents
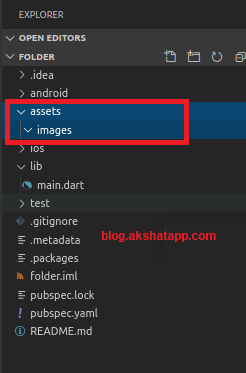
step 1 : Create “assets/images” folder in your project directory
- Create “assets” folder in your project root directory.
- Create “images” folder in your assets folder.
 |
|---|
| Flutter Assets Images |
Note :
Your “assets” folder will have “images” and many other project assets like “fonts”, “icons”, “animation files” etc.
step 2 : Add images to your “images” folder
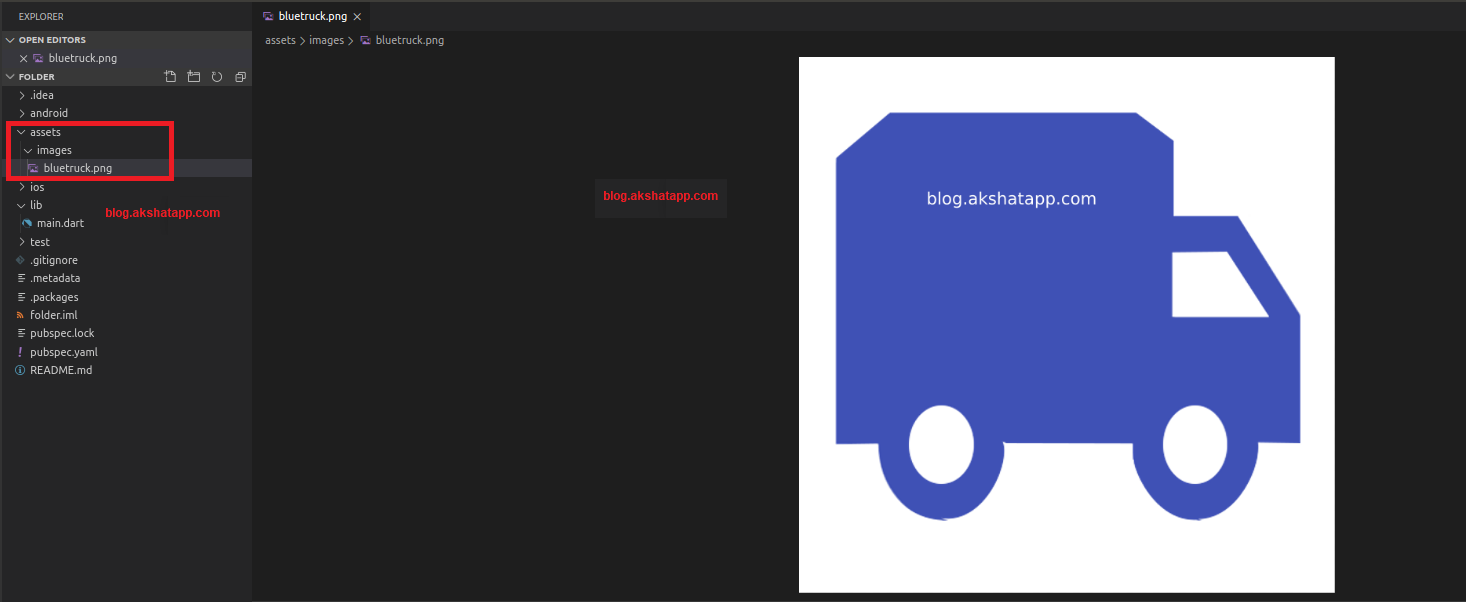
- Just drag-n-drop your image inside the “images” folder
 |
|---|
| Add images to your flutter project |
- Image Relative Path : assets/images/bluetruck.png
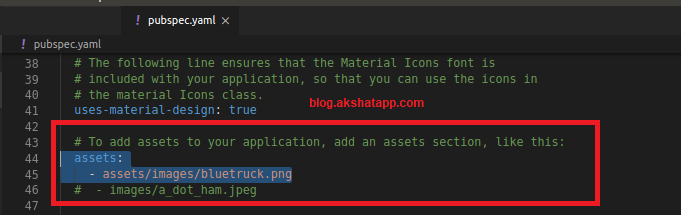
step 3 : Register your assets folder in pubspec.yaml file
- Open pubspec.yaml file
- Add assets subsection to the flutter section or uncomment the assets section and add your image relative path.
-
Save the pubspec.yaml file and run “flutter pub get command” in terminal.
- If using Android Studio - Save the file and Click Packages get in action ribbon.
- If using VS Code : It automatically runs command on saving pubspec.yaml file.
 |
|---|
| Flutter pubspec.yaml file |
Note : If you have multiple images that you want to include in your project then you can skip the filename.
For Example,
  assets:
    - assets/images/
- This includes all the images inside “images” folder.
- This is helpful when we have many images to be included in our project.
- Say, we have 25 images in our “images folder” so we will not have to register each image filename inside pubspec.yaml file separately.
- Using the above syntax we can include all images in a single line.
step 4 : Code Implementation - Use Flutter Image class
Flutter Image Class - Documentation
Also refer official class documentation with this guide to deeply understand the concept.
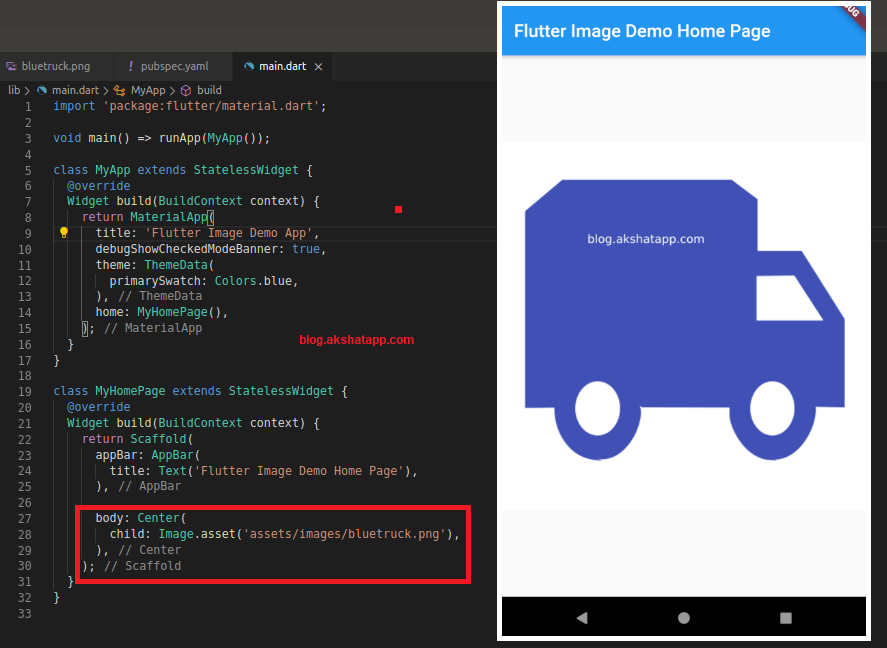
Let us start with the simplest way to display images in our flutter app.
Coding - Flutter Sample App Code
import 'package:flutter/material.dart';

void main() => runApp(MyApp());

class MyApp extends StatelessWidget {
  @override
  Widget build(BuildContext context) {
    return MaterialApp(
      title: 'Flutter Image Demo App',
      debugShowCheckedModeBanner: true,
      theme: ThemeData(
        primarySwatch: Colors.blue,
      ),
      home: MyHomePage(),
    );
  }
}

class MyHomePage extends StatelessWidget {
  @override
  Widget build(BuildContext context) {
    return Scaffold(
      appBar: AppBar(
        title: Text('Flutter Image Demo Home Page'),
      ),

      body: Center(
        child: Image.asset('assets/images/bluetruck.png',),
      ),
    );
  }
}
 |
|---|
| Flutter Image Class |
Frequently Asked Questions
Share This Post
The information contained on this blog is for academic and educational purposes only. Unauthorized use
and/or duplication of this material without express and written permission from this site’s author and/or owner
is strictly prohibited. The materials (images, logos, content) contained in this web site are protected by
applicable copyright and trademark law.

Join our newsletter!
Get the latest developer guides, tutorials, and tips delivered straight to your inbox.